Do you know how to upgrade your TFS 2010 databases? (the big one)
Updated by Brady Stroud [SSW] 1 year ago. See history
123
<introEmbed
body={<>
We recommend doing a [move to a new environment](/do-you-know-your-migration-choices1) because it has a much easier rollback path if something goes wrong.
Note that these steps will also work for upgrading from TFS 2012 RC to RTM, or RTM to Update 1.
</>}
/>
These are the steps to migrate and upgrade to a new environment:
- Send an email to let everyone know the server will be offline
- Take the TFS 2010 server offline
- Copy the TFS 2010 database backups to the TFS server or the new SQL Server instance. Make sure the URL is accessible from the TFS server via a network share.
- Install Team Foundation Server 2012 or TFS 2012 Update 1 (see Damian Brady's experiences).
- Make sure you have access to coffee while it's installing - it could take a while!

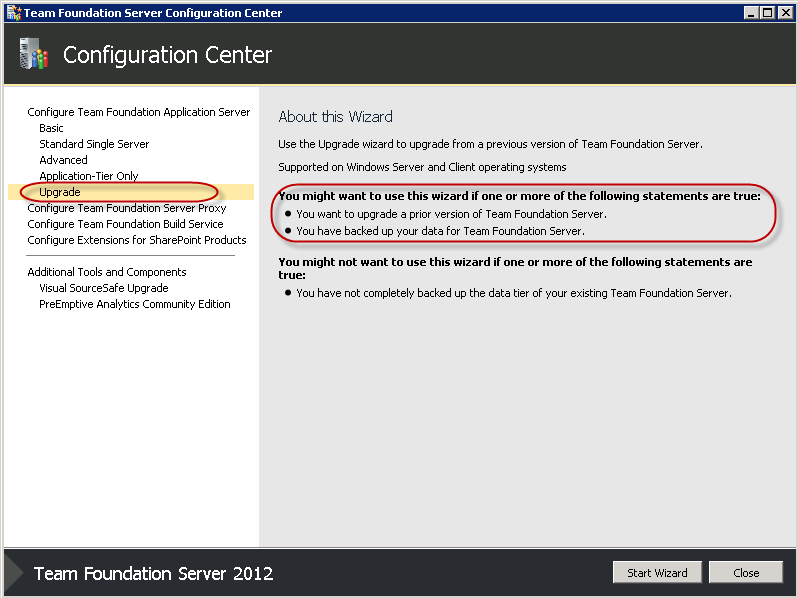
- After the install has completed, the Team Foundation Server Configuration Center will start
- Select Upgrade | Start Wizard
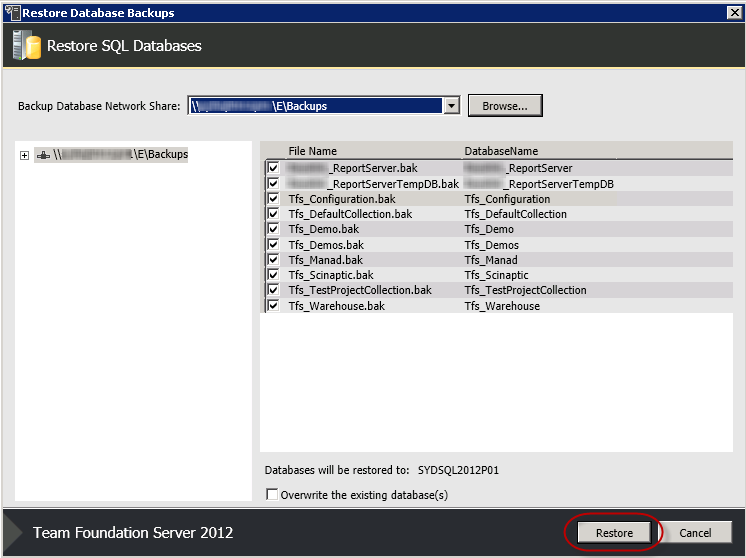
- Launch the Database Restore tool by clicking on the link
- If necessary, change the Target SQL Server Instance and click Connect
- In the Restore Database screen, Browse, then navigate to the folder with your database backups. Make sure all of them are ticked, then click Restore.
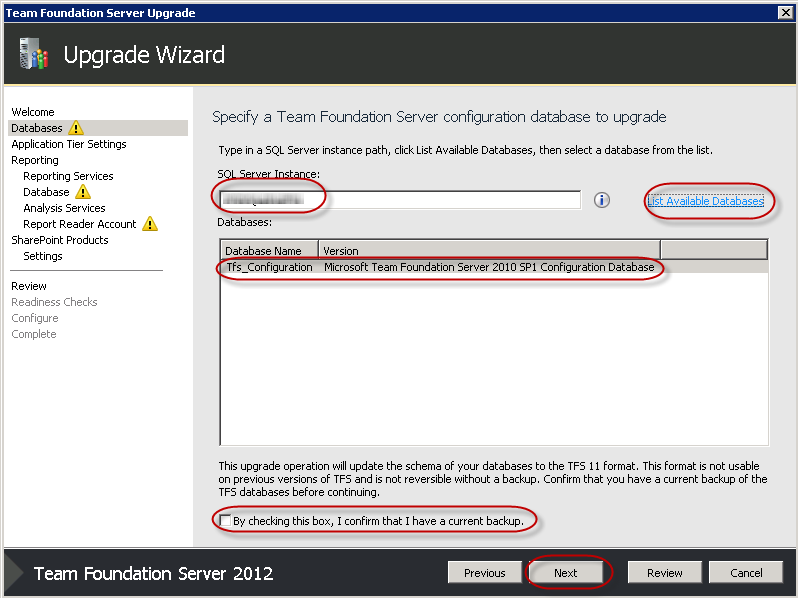
- Click Close, then click Next in the Upgrade Wizard
- Choose the configuration database by specifying the SQL Server Instance and clicking List Available Databases
- Check "By checking this box, I confirm that I have a current backup.", then click Next
- Leave Network Service as the service account for the Application Tier, then click Next
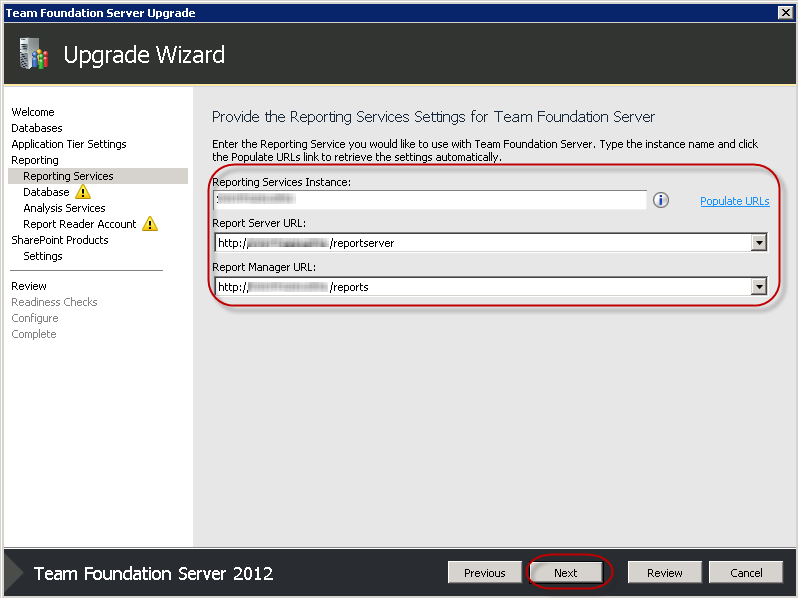
- Check the checkbox to confirm we want to configure Reporting Services, then click Next
- Make sure the Reporting Services instance and URLs are correct, then click Next
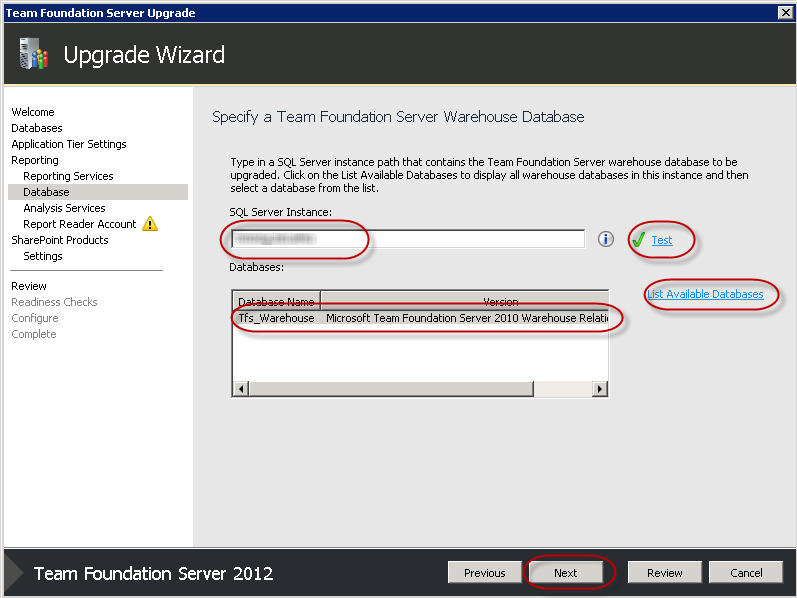
- Update the SQL Server Instance for our Warehouse Database, and click Test to test the connection
- Click List Available Databases and check the Tfs_Warehouse database is shown, then click Next
- Click Next on the Analysis Services page
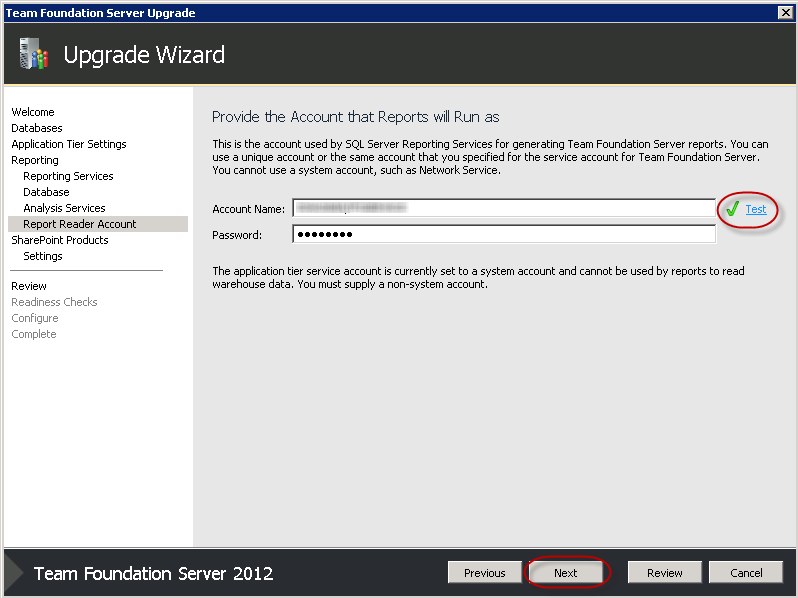
- Provide details of the TFSService account your reports will run as then click Next
- Check the checkbox to say we want to configure SharePoint, then click Next
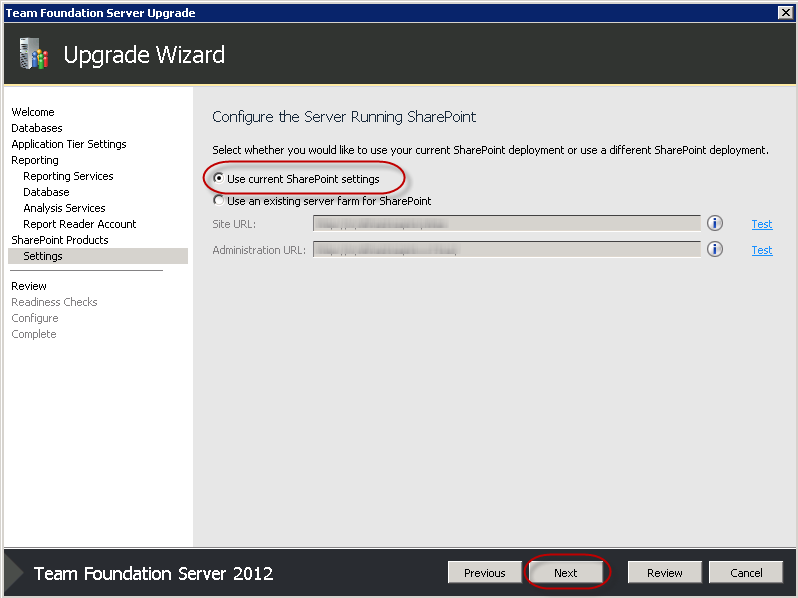
- Choose "Use current SharePoint settings", then click Next
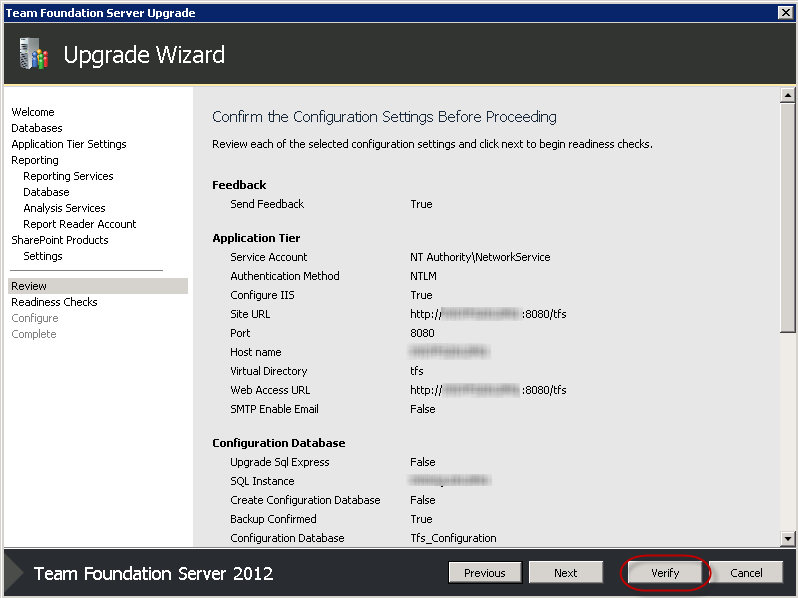
- Confirm the details on the Summary page and click Verify
 Note: At this point, you may be asked to reboot and start the wizard again. Don't despair - it's quicker the second time!
 - Once you have all green ticks, click Configure
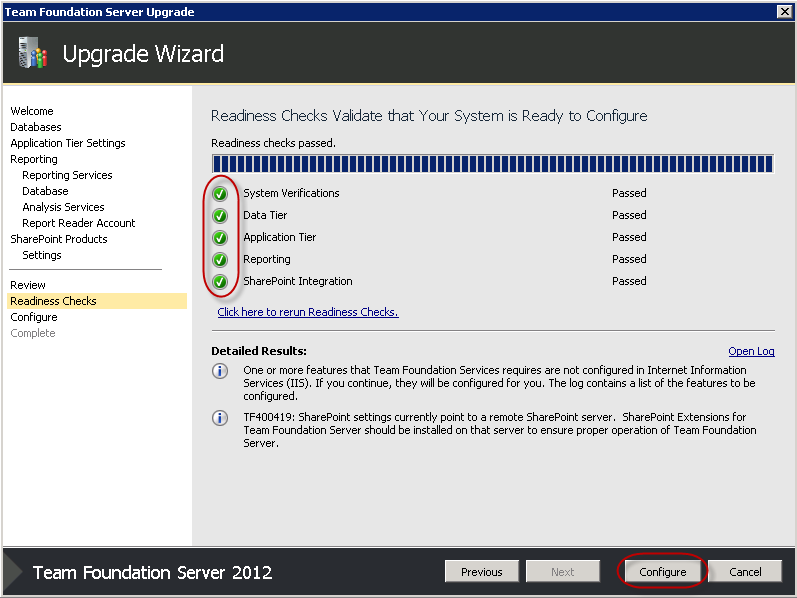
- Have a coffee
- Click Next
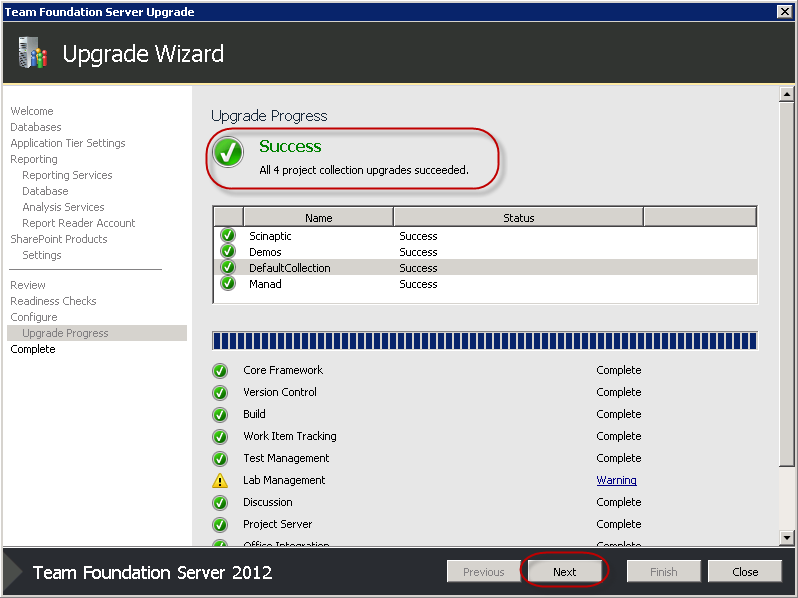
- Click Close, then Close again.
- Change the DNS entries for your TFS server to point to the new TFS 2012 server
 Note: It's a good idea to get the SysAdmins involved at this stage
Categories
Acknowledgements

Related rules
Need help?
SSW Consulting has over 30 years of experience developing awesome software solutions.